
Sunday, July 1, 2012
Happy Canada Day!
Happy Canada Day everyone. Hope everyone has a safe and fun day celebrating. I'm back from my trip, and enjoying the weekend off with my Hubs.

Saturday, June 30, 2012
Happy Birthday
At this moment 26 years ago I was born. I'll be celebrating my birthday with my Hubs, who luckily has the weekend off with me.

Thursday, June 28, 2012
Graduation Day!!
Congratulations to my brother who graduates high school today. May you enjoyed continued success in whatever endevors you encounter.

Wednesday, June 27, 2012

Monday, June 25, 2012
Wedding DIY
To help cut costs for our wedding, I DIY'd a bunch of items, or purchased items that weren't considered wedding-y, but still worked with our theme.


 Decorated with white and aqua stick on half pearls
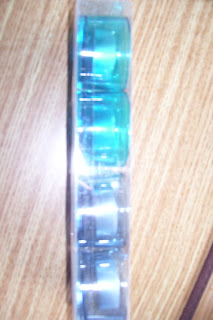 Tealight holders I found in our wedding colors for a buck a piece
 I bought the girls a crystal pin with their first name initial on it to be placed on their bouquet. I paid $3 for each one from Walmart.
 I bought these earring and necklace sets from walmart for each of the bridesmaids. The necklace had each girls first name initial. It made them extra special to wear on the wedding day.
 I bought these cards in the discount bin at Michaels for $1 (per pack of 10) and used them for table numbers and menu cards. The aqua trim matched our colors and I printed the menu and table number in chocolate brown. The starfish holder was bought at the dollar store for 2 for $1.


 I bought these little bags from Michaels (again going with the chocolate brown color), and personalized the stickers with our names, wedding date and last name in the big letter. I bought ribbon that said "thank you" ($1 a thing for the ribbon) for guests to use to close the bags


 I added our wedding date to the bottom of my other shoe


I found our initials and last name initial at Michaels, and thought it would be cute to put them on our candy table, blinged up a bit.

Decorated with white and chocolate brown stick on half pearls


I found these travel makeup bags at Superstore for the girls, they matched our colors perfectly and were $5 each.

Hubs found this cake cutting set at a little shop set up outside his work. They are made local and the colors in the stones matched perfectly.

I bought these Shoes at Le Chateau for $20 and decided to bling them up on my own

I bought these at Michaels Craft store, had to have one to keep and one to toss, paid ~15 for both


Used crystals to add my new last initial to the bottom of my wedding shoes

Bridesmaids used the crystals to add something blue to their flip flops. Flip flops were less then $5 at Old Navy for the girls.

Name brand of the crystals I used on my shoes and the girls shoes. I believe I paid around $8 for the pack, but there were a ton of crystals in it.


For our candy table, I hand made chocolate pretzels with light blue drizzle on them

I found iron on decals of "maid of honor, bridesmaid, and bride" for $1 a piece in the Michaels clearance bin. We picked up black and a white tshirt at Walmart for $5 each, and wore these to my bachelorette party.
Friday, June 22, 2012
Wedding Invites
When Hubs and I first got engaged I started looking for wedding invites. Boy was I suprised to find out how expensive they are. I looked into professional companies (way way to expensive), online companies (wasn't comfortable with doing everything online), and some local businesses (looked a little to cheap in my mind). I started looking into the idea of doing my own wedding invites (thanks The Knot for the idea) and started looking around. I decided to check out Michael's Craft Store, since the girls on the Knot were always using Michaels for all sorts of wedding DIY. They had a huge selection of wedding invites to choose from and at a decent price. I was lucky to come across 2 different sets (1 chocolate brown and 1 light blue), that fit my wedding colors so I bought one of each (unfortunately I can't find them on the Michaels website anymore). They were from the Bride collection and cost $55 each (for 30 invites I believe). I bought them with 50% off store coupons, so I was able to get 2 boxes of invites for $55.
I was a little worried about doing the invites on my own but they turned out pretty good. The invites came with instruction on how to word various parts, as well as how to run them through the printer. The first 1-2 invites I did ended up working out the kinks and after that it was smooth sailing. I loved that I could customize the font color and style and word the invites however I liked. I ended up mixing and matching both boxes of invites to get our wedding colors in each invite. I also hand addressed the envelopes as I found it easier then typing and printing each envelope. I was also pleased to find out that my invites could be mailed with a regular postage stamp.

 Here is a pic of one of our finished invites, sorry its on its side, I can't seem to turn it around.
I would definitly recommend the Bride collection of invites to any Bride. They are easy to use, inexpensive and a fun way to DIY part of your wedding day
I was a little worried about doing the invites on my own but they turned out pretty good. The invites came with instruction on how to word various parts, as well as how to run them through the printer. The first 1-2 invites I did ended up working out the kinks and after that it was smooth sailing. I loved that I could customize the font color and style and word the invites however I liked. I ended up mixing and matching both boxes of invites to get our wedding colors in each invite. I also hand addressed the envelopes as I found it easier then typing and printing each envelope. I was also pleased to find out that my invites could be mailed with a regular postage stamp.

The brown invite set

I would definitly recommend the Bride collection of invites to any Bride. They are easy to use, inexpensive and a fun way to DIY part of your wedding day
Wednesday, June 20, 2012
Up, up and away....
Later today I'm catching a flight home to visit with my family and friends for 10 days. I'm so excited, its been a year since I've been home and seen anyone, and I'm excited to watch my brother graduate high school. I just wish Hubs could have gotten the time off work to come with me.
Subscribe to:
Posts (Atom)